 |
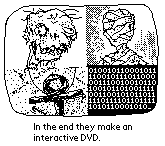
| This is an image from the comic series Zombie and Mummy, drawn on a Palm Pilot. The data is reproduced exactly: one pixel on the monitor equals one pixel in the image. |
Every single time one of my low resolution screen graphics is about to be printed in a book or catalogue i am asked to please send the "real version" of the graphics to the designers in charge. Because when printed, so i am told, all images should at least have a resolution of 300 dpi. This is wrong. Let me shortly explain how to do it right:
What are low resolution screen graphics after all?
They are images that were made to be looked at on a monitor screen. A monitor can in no way display as many pixels (the little squares digital images are made of) on the same amount of surface as a printer or an offset printing machine. The art in screen graphics is to use the few available pixels to the best extend, so usually each single pixel is deliberately and carefully placed. Typical applications of screen graphics are video games, web sites and graphical user interfaces.
Of course screen graphics do not have a resolution of 300 dpi, which would be useful for printing photos. The "resolution" value indicates how many pixels are covering one surface unit. With photographs, 300 dpi -- 300 "dots per inch" -- ensure a very detailed and faithful reproduction.
Screen graphics, however, do not have any resolution values. The wrong assumption that they have originates from the Apple DTP community. Once upon a time all Apple monitors were locked to a resolution that equaled 72 dpi. But today even Apple computers allow the user to set arbitrary monitor resolutions. -- In general the connected monitor and the selected resolution dictate how big a pixel really is. On a sub-notebook screen, a pixel might be a tenth of a millimeter, when it is projected with a video beamer the length of its edge might be several inches. Also with videogames, the pixel size depends on the size of the TV that is used. Because of all this it is impossible to tell the resolution of screen graphics. The only thing that counts is what pixel has what color.
It is very important for screen graphics, especially when reproduced in a foreign medium like an art catalogue, that the original data remains unchanged. Each pixel needs to be preserved so that different pixels are distinguishable -- just like on the monitor! So never change the "resolution" of a screen image. Image processing software like Adobe Photoshop® interpolates gradients between the original pixels when the resolution is "enlarged" and through this dramatically changes the impression of an image.
Most of the time it is the right way to use a layout software to bring the image to the desired dimensions. Each pixel square will be resized without generating gradients. This works because the layout software would not try to change the original image data. Instead, a larger amount of surface is used to display the same data.
|
|
Now an example of how not and never ever to do it:
|
It can happen that when printing the image is enlarged and interpolated, although the image data has not been modified in an image processing software. Actually this can theoretically happen anywhere in the long chain of programs that brings an image to paper, even in the printer driver itself. If this happens it is impossible to deactivate the interpolation function. Printer drivers from the companies Brother and HP have been reported to behave like this.
In this case it can be helpful to resize the image data manually, so the printer driver thinks that the image resolution is already big enough and leaves it alone. To do this, load the image into an image processing software and change the dimensions in pixel or percentage units to a whole number multiple of itself. Choose the enlarging method that only duplicates pixels and does not interpolate. Usual names for this method are "nearest neighbour", "pixel repeat", "jagged" or "resize" (in opposite to "resample").
This "automatic interpolation effect" only happened when an image was printed by itself. When an image is a part of a layout and printed from e.g. a PDF file or a layout software, it didn't happen (yet).
Never save screen graphics in the JPG format!! Every single pixel is important in screen graphics. But JPG compression is lossy, meaning that the pixels don't necessarily have the original position and color. In a high resolution photo you will not be able to see this difference. For low resolution screen graphics it is simply fatal when the already not so many pixels are moved and recolored!! Instead, use e.g. the TIFF or PNG format.
But careful with the TIFF format: from some softwares it is possible to embed JPEG compression into the TIFF file format. Use only the LZW compression!
|
|
|
Again it becomes clear how computer culture is badly affected by the idea of the computer being a "media center". Following this idea, a computer is mainly used to process photos and videos with photographic content. This is outrageous!